As a website owner, understanding how visitors interact with your content is essential to reach your goals. Whether you aim to build a loyal readership, boost sales or establish yourself as an authority in your niche. Having accurate website traffic data is crucial.
This is where Google Analytics comes in. It’s a free, powerful tool from Google that provides valuable insights into your audience’s behaviour. With this data, you can make informed, data-driven decisions to improve your website and content strategy.
In this guide, we’ll provide a step-by-step walkthrough on how to set up Google Analytics Account.
Why Do You Need Google Analytics?
Bloggers often start a blog with a primary goal of high traffic and loyal subscribers. So, you need actionable insights to achieve this goal. Google Analytics is the ultimate tool to provide these insights.
With Google analytics, you can make informed decisions based on real data. Google analytics enable you to optimize your blog and enhance user experience.
-
Understand your visitors
Google Analytics gives you detailed information about your audience. It includes geographical location, browser preferences, screen resolution and more.
This valuable data helps you to customize your information according to the audience needs. For example, the majority of users are on 1280px screen resolutions, you should make sure that your site layout is compatible with that or smaller resolutions.
You can create a seamless user experience with these adjustments. Increasing engagement and satisfaction.
-
Track User Journey On Your Website
Analytics offer assistance monitor user experience on your site. In this way, you can understand what the user does after arriving on your website.
By tracking navigation paths, You can see the exact routes a user takes through your site. It reveals which pages are attracting more users and which users need improvement.
By observing the session durations, you can measure your content engagement. Moreover, bounce rate highlights the rate of visitors, who leave immediately or after viewing only one page.
This useful data helps you to make strategic improvements. You can also refine the user journey. It suggests making more engaging, relevant content. So, the users will keep exploring, staying longer on your site.
You can also use the analytics to find which content pieces are working well. By recognizing the type of content your audience wants. You can deliver value where it matters most. Resulting in improved site performance and user satisfaction.
-
Pinpoint When Your Audience Visits
With google analytics you can identify your traffic hours, when most of your audience visits your website. With this feature, you can determine the best time to publish your posts.
If your ideal publishing time doesn’t align with your schedule, you can use scheduling tools to post during those high-traffic periods. This ensures your content reaches your audience when they’re active.
-
Discover How People Find Your Blog
Understand your traffic sources from analytics. Visitors can land directly from search engines or through the referral links. It provides valuable insights to optimize your blog’s performance.
You can fine tune your SEO strategy. By identifying which search engines your content is performing well. Tracking direct traffic, you can highlight brand awareness and user loyalty.
While analyzing referrals help you to pinpoint external sites or platforms that actively drive traffic. This approach opens opportunities for collaboration or guest blogging. Additionally key referral resources like social media platforms allow you to create engaging content. Maximizing your reach and engagement.
-
Analyze User Interaction with Your Content
Google analytics give valuable insights into user engagement. By tracking which CTAs (Call-to-Actions) are getting more clicks.
This tool helps you to refine your CTAs and internal linking strategies to improve user interactions. You can optimize your content layout by identifying high performing elements.
Prioritizing effective strategies while discarding those that underperform. In this way, you can make a steady improvement.
Set Up Your Google Analytics Account
You can use Google Analytics for free. You just need a Google Gmail Account to sign up with Google Analytics. Signing up with this tool is quite simple. Follow the instructions and create yours.
Sign Up With Google Analytics
First of all, open Google Analytics website in your browser. Here’s a Button “Get Started Today”. Click on it.
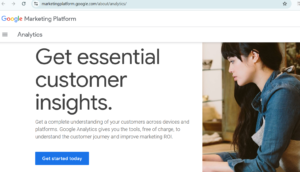
Then a screen will appear with a pop up asking to login to your google account. If you already have a google account then well and good. You can use it to sign in. But if you don’t have one, first you need to create one for you.

After signing in your Google account, you will land on a welcome screen. Now you can create your Google Analytics Account .
Start by clicking the button “start measuring”
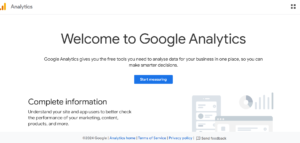
By clicking, you will move to the next page. Here you need to give your account a name. This account name is just for your convenience.
So, you can use anything as a name. Most probably your business or blog name.
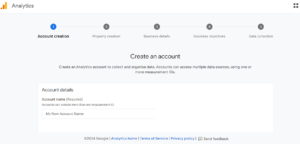
Here multiple account data sharing settings will be shown. From these settings, you can control your Google Analytics Account Data Sharing.
You can also choose the default settings and move to the next step.

Next you need a google analytics property. Here’s a new version of this tool called Google Analytics 4 or GA4. This latest version is an all in one version. You can track your website and mobile apps with the same single account. It will also provide you with new features, metrics and new interface for reports.
Start initialling by adding your property name and adding your currency and reporting time zones. Then click next.

Choose your industry category in the industry section. Also select your business size from the options given. After these steps click next.

On the next page, you need to choose your business objectives. Also specify for which purposes you want to use the google analytics. This approach will help to create the specialized reports.
You can clearly state your objective as generating leads, sales, brand awareness, user behaviour and more.
You can select more than one option as per your needs. We will suggest selecting “baseline reports” for the detailed reports. After completing these steps click on next.

On the next page you will see the web stream options. As we are creating Google Analytics for WordPress, choose the Web platform.

Now you have to add the website name, URL and stream name. Google Analytics has an “enhanced measurement” feature. It’s enabled by default. Now you can monitor pageviews, scrolls, outbound clicks and file downloads.
Then click on the “create stream” button.

Here your Stream name, URL, ID, and Measurement ID are displayed.

Here you will see the pop up bar alert on the top. It includes instructions on how to install Google Analytics in your WordPress.
By clicking on the ‘View tag instructions’ button. Here you will find different ways to add the Google Analytics tracking code in your site.
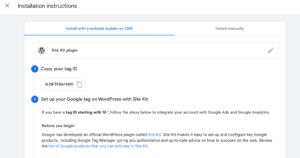
You can also switch to the manual button to see the tracking code.
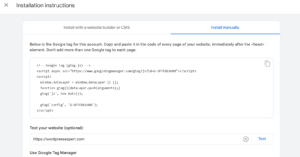
Next copy this tracking code and enter it in the wordpress site. Keep the Google Analytics tab open, You will need to revisit it after installing the code on your WordPress site.
Congrats you are all set now.
Final Words
By using Google Analytics, you can track visitor demographics, pinpoint high-traffic hours and analyze content performance. These insights enable you to create customized strategies that boost engagement, enhance user satisfaction and ultimately drive your website’s growth.
Following the step-by-step guide outlined in this article, you can easily set up Google Analytics and make informed decisions.
But if you still need assistance we are here to help. Get in touch with our experts. They will guide you through the whole process or create one for you.

